
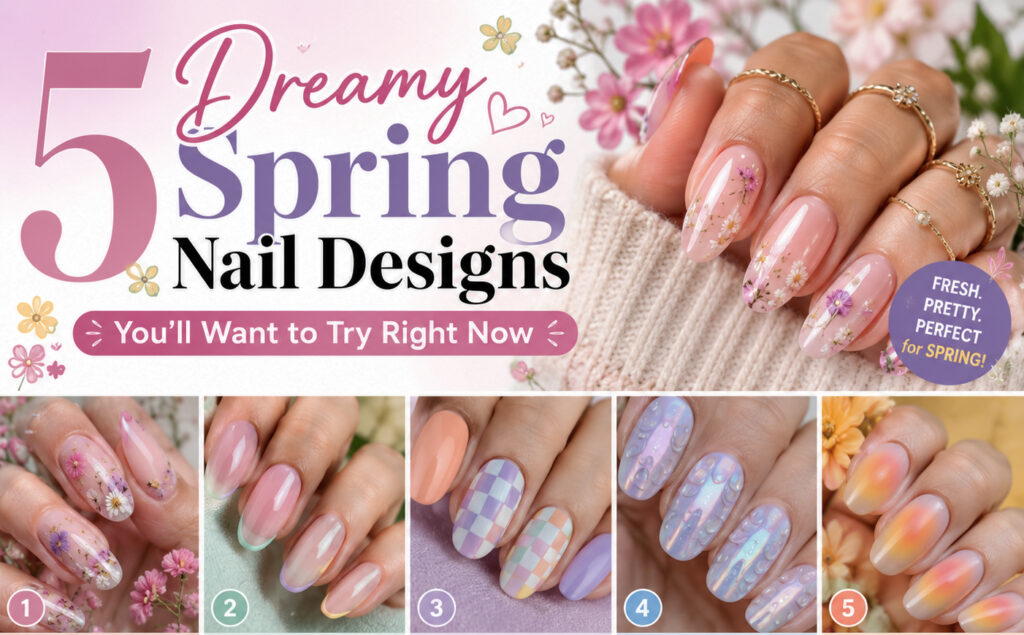
You’ll Want to Try Right Now
Spring is finally here. The sun stays out a little longer, flowers start to peek through the soil, and there’s this gentle feeling of a fresh beginning in the air. For many of us, that also means one thing: it’s time to give our nails a cheerful, seasonal makeover.
If you’re tired of the same old solid colors or dark winter shades, you’ve come to the right place. I’ve gathered five beautiful spring nail ideas that are playful, elegant, and surprisingly easy to recreate – whether you’re a salon regular or a DIY enthusiast. Each design captures a different mood, from romantic and whimsical to clean and modern.
Let’s dive in and find your perfect spring look . . . .
1. Dainty Pressed Flower Nails
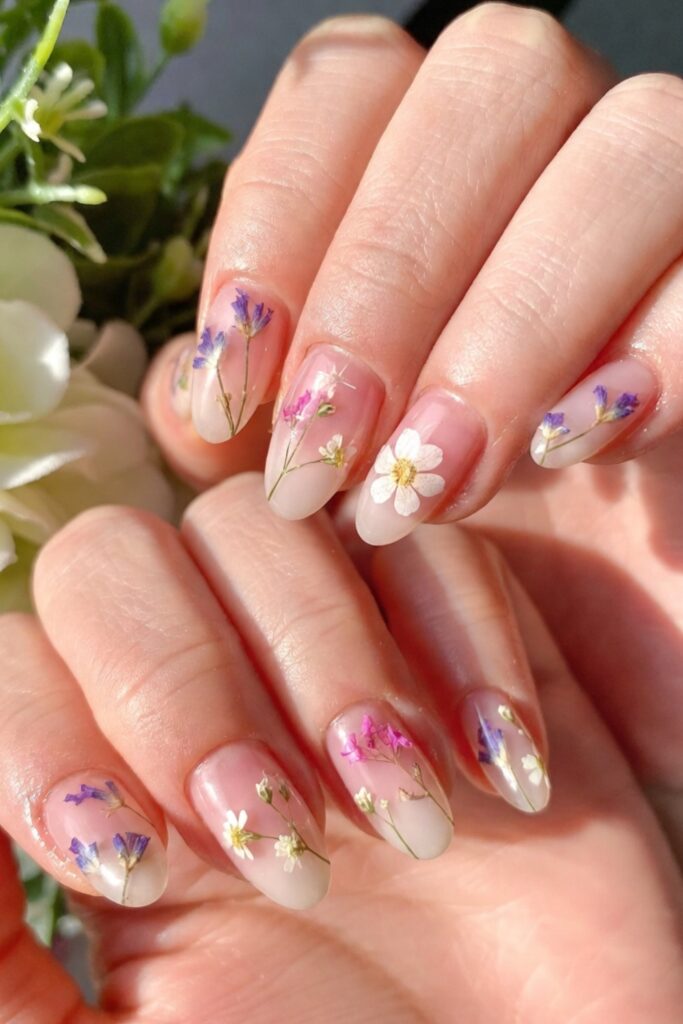
Imagine walking through a garden on a warm April morning, then capturing that magic on your fingertips. That’s exactly what dainty pressed flower nails feel like.
This design uses tiny, real dried flowers – think lavender, baby’s breath, or miniature daisies – sealed inside a clear or soft pink gel base. The result is a delicate, romantic look with a gentle 3D effect that stays completely smooth to the touch.
Why you’ll love it:
It’s nature-inspired without being too “loud.” The flowers add texture and story, while the sheer or nude background keeps everything elegant.
How to style it:
For a modern twist, place a single pressed flower on your ring finger (the accent nail) and leave the rest in a glossy “glazed donut” nude or milky white. You can also scatter tiny petals across all nails for a more whimsical, fairy‑core vibe.
Pro tip for home artists:
You can buy packs of assorted dried flowers online or from craft stores. Apply a thin base coat, place the flower gently with tweezers, then seal with two layers of clear top coat or gel. Make sure the edges are fully covered so they don’t lift.
2. “Baby’s Breath” Micro-French Tips
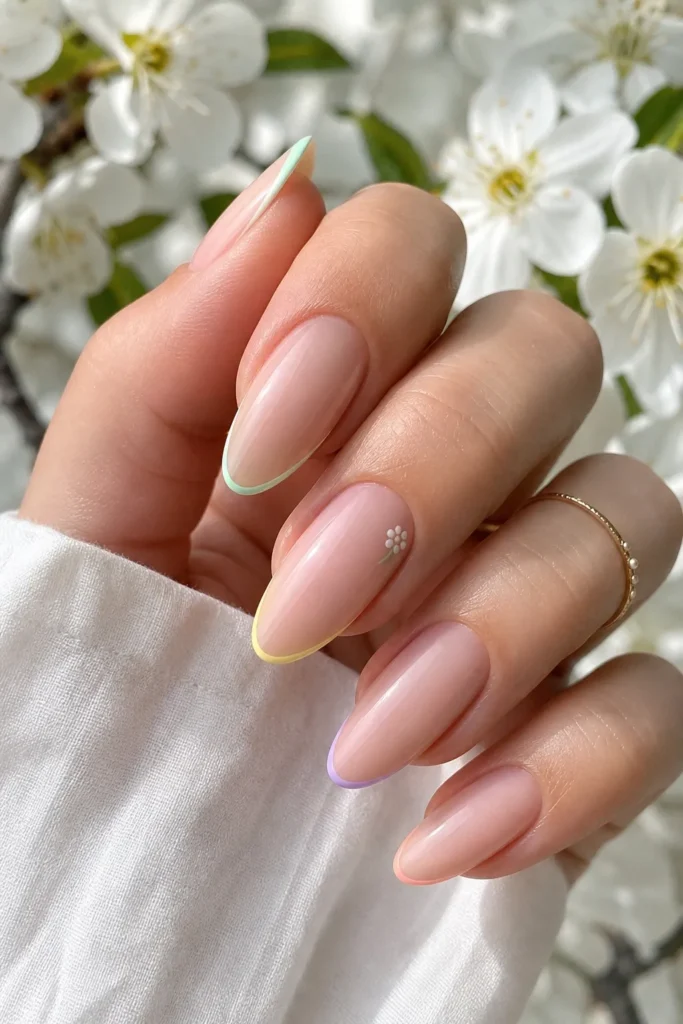
We all know the classic French manicure – white tips, pink base. But spring calls for something softer, fresher, and more playful. Enter the micro‑French tip, also known as the “baby’s breath” manicure.
Instead of bold, thick white lines, this design uses ultra‑thin strokes in delicate pastel colors. Think mint green, butter yellow, lavender, or peach. The line sits right at the very edge of your nail, almost like a whisper of color. Pair it with a sheer, glossy pink or nude base, and you get a manicure that feels clean, modern, and airy.
Why you’ll love it:
It lengthens the look of your fingers without being dramatic. The pastel tips are unexpected but not overwhelming – perfect for the office, brunch, or a spring wedding.
How to customize it:
You can go monochromatic (all nails with the same pastel tip) or rainbow – each nail a different soft shade. For an extra delicate touch, add a tiny dot or small flower near the cuticle.
Pro tip:
Use a thin nail art brush or even a toothpick for precision. If you’re shaky‑handed, apply a strip of tape or a sticker guide just below the tip, paint the edge, then remove the tape while the polish is still wet.
https://stockanalysis.com/pro/?ref=jagath
3. Pastel Checkerboard (Gingham Print)
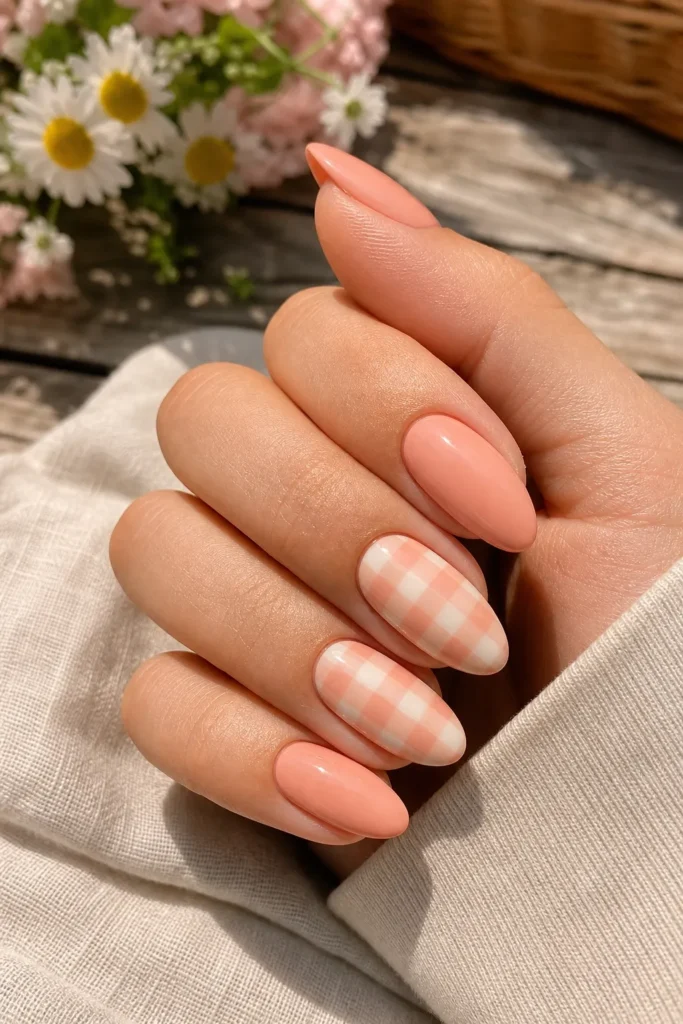
There’s something about a picnic blanket in the park that just screams spring. The pastel checkerboard – or gingham print – brings that cozy, happy feeling to your nails.
This design uses two soft spring shades, like peach and cream, or lavender and baby blue, to create a simple 2×2 grid. You can paint it on one or two accent nails while keeping the rest of your nails solid in one of the two colors. The result is playful, slightly retro, and incredibly charming.
Why you’ll love it:
It’s bold enough to be noticed, but the pastel tones keep it soft and feminine. It also works beautifully with a matte top coat for a fabric‑like texture.
How to keep it balanced:
The key to a non‑chaotic checkerboard is restraint. Limit the pattern to your ring and middle fingers only. Paint your thumb, index, and pinky in a solid matching pastel. This creates a cohesive, Instagram‑worthy look.
Pro tip:
You don’t need to be a painter. Use a small square stamper or even strip of sponge. Or simply paint horizontal and vertical lines to form a grid, then fill in the alternating squares. Practice on a piece of plastic or a swatch stick first.
Read This – Nail Care Guide eBook
4. Iridescent “Dew Drop” Nails
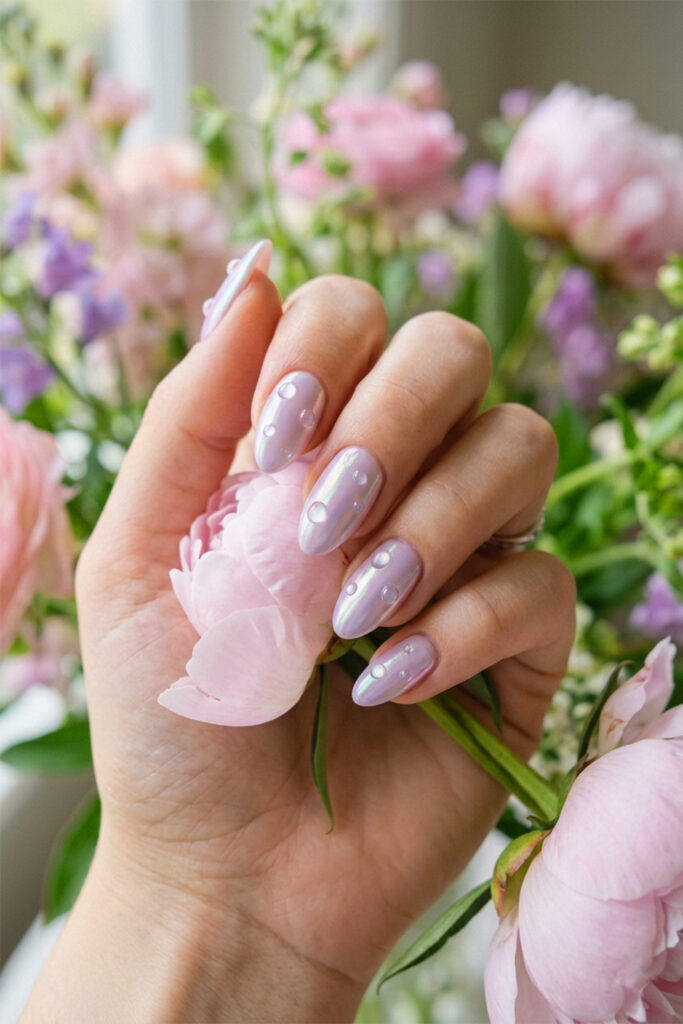
Spring showers bring May flowers – and they also bring the most magical nail trend of the season: dew drop nails.
Start with a milky, semi‑sheer white or soft lavender base. Then add an iridescent chrome powder on top for a holographic, water‑like shimmer. The final touch? Scatter a few 3D clear gel beads (the “dew drops”) randomly across the nail plate. When light hits them, they sparkle like fresh morning rain.
Why you’ll love it:
It’s romantic, dreamy, and unlike anything your friends have worn. The combination of the pearlized shimmer and the raised droplets feels both futuristic and organic.
How to wear it:
This design looks best on medium‑length almond or oval nails. Keep the beads small and sparse – one to three per nail is plenty. Too many, and it becomes cluttered.
Pro tip:
If you don’t have chrome powder, you can use an iridescent or unicorn top coat instead. For the dew drops, clear gel or even thick top coat applied with a dotting tool works. Cure under a UV lamp if using gel, or let air‑dry polish set for a long time before adding drops.
https://clients.verpex.com/aff/?a_aid=refid&a_aid=69d27e5eb64e7
5. Soft “Aura” Blur (Reverse Gradient)
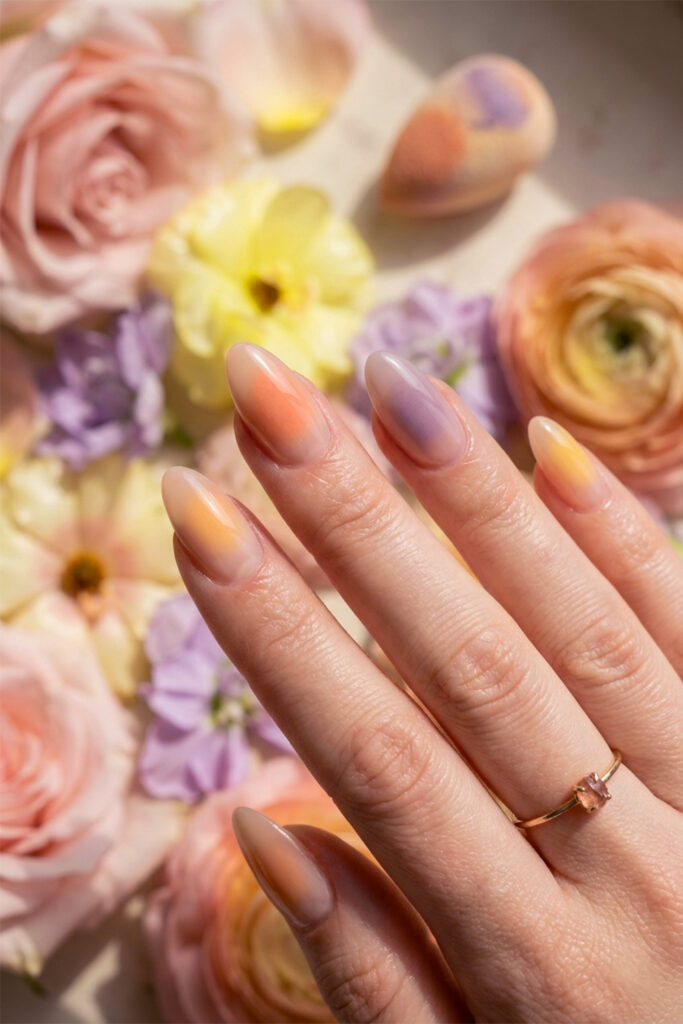
Last but certainly not least, meet the aura blur – also called heathered nails. This design creates a soft, dreamy halo of color in the center of each nail, fading outward into a sheer nude edge. It looks like a warm sunrise or a flower petal caught in soft focus.
Spring colors work perfectly here: a warm peach, sunny yellow, blush pink, or soft lilac melting into a transparent, barely‑there base.
Why you’ll love it:
No sharp lines. No perfectionism required. In fact, a little bit of unevenness only adds to the dreamy, blurred effect. It’s forgiving, relaxing to paint, and incredibly elegant.
How to achieve the look:
Use a small eyeshadow sponge or a nail sponge. Apply a dab of your chosen color in the center of the nail, then gently tap outward in a circular motion. Let dry, then repeat for intensity. Finish with a glossy top coat to blend everything together.
Pro tip:
For the most natural aura, choose a color that’s close to your skin tone’s flush – peach for warm undertones, lavender for cool. And always use a sticky base coat so the sponged color grips evenly.
https://studio.tripo3d.ai/?via=ru1920
Table of Contents
Which One Will You Try First?
Spring is the season of trying something new. Whether you prefer the romantic feel of pressed flowers, the clean lines of micro‑French tips, the playful picnic vibe of gingham, the magical shimmer of dew drops, or the effortless blur of an aura nail – there’s a design here for every mood and skill level.
Don’t be afraid to mix and match. Maybe a micro‑French tip on one hand and pressed flowers on the other? Or pastel checkerboard on your toes? The most important thing is to have fun and let your nails bloom along with the season.
Save this article, grab your favorite polish, and get ready to welcome spring in the most colorful way possible. Happy painting 🌸
Hi, Friends . . .
“Which design will you try first? Grab your polishes and tag us in your spring manicure – we can’t wait to see your creativity bloom. 🌷”
“Ready to give your nails a spring refresh? Save this guide and share it with a friend who loves nail art.”
“🌸 Save this for your next salon visit! Which number is your favorite? 1–5 in the comments.”
“Tap the link to see all 5 dreamy spring nail designs – your next manicure is waiting 💅✨”
Read This – Nail Care Guide eBook