
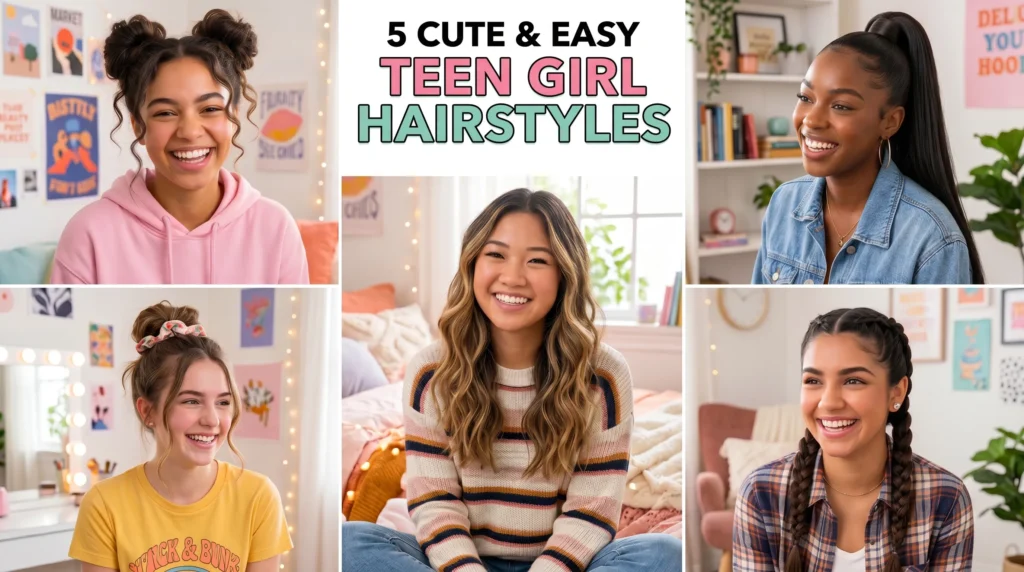
Perfect for School, Sleepovers & Hangouts
Imagine having exactly ten minutes left to get fully ready before heading out the door.
Your hair is currently trapped in that awkward middle zone where it is not quite straight, not quite wavy, and completely refusing to cooperate. To make matters worse, you look at the clock and realize you are already running incredibly late for your first class.
Does that stressful scenario sound familiar to you?
The good news is that you absolutely do not need an expensive professional salon blowout, a massive budget, or a vanity drawer overflowing with complex styling tools to look incredibly polished. You simply require a solid rotation of reliable hairstyles for teen girls that work in perfect harmony with your busy weekly schedule and your specific hair density.
In this comprehensive style guide, I am breaking down five of my absolute favorite, quick-to-style hair trends. They are on-trend, fast to execute, and look beautifully intentional. Whether you are prepping for a long day of lectures, a weekend sleepover with your best friends, or a casual afternoon hangout, these trusty styles are guaranteed to rescue your morning routine.
Let us get started!
1. The “I Woke Up Like This” Messy Bun Hairstyle
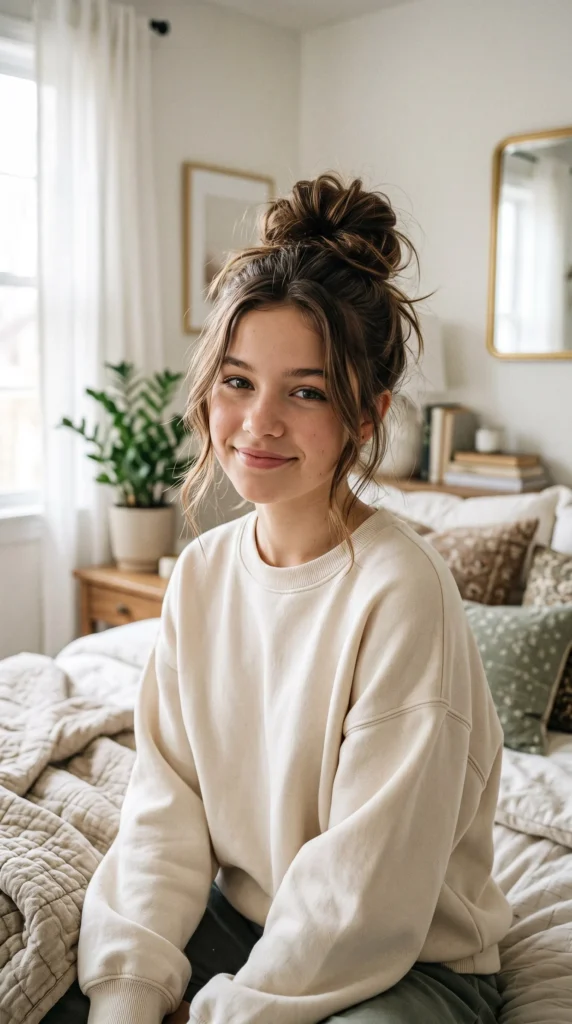
There is an undeniable charm about that perfectly imperfect, voluminous high bun that looks totally effortless yet remains incredibly cute and stylish. The messy bun is the absolute ultimate styling uniform for rushed school mornings when every single second counts.
The secret to mastering this look is surprisingly simple: put your hair brush down entirely. Freshly washed, slippery hair lacks the necessary structure to sustain an updo, whereas day-two or day-three natural hair texture holds a bun beautifully without sliding apart by lunch period.
How to execute this look in 60 seconds:
- Flip your head completely forward toward your knees.
- Gather all of your hair together at the very crown of your head as if you are preparing to tie a high ponytail.
- On the final wrap of your elastic band or scrunchie, do not pull the length all the way through the loop.
- Leave the hair folded into a secure, rounded loop and let the remaining free ends stick out playfully at the base.
- Use your fingertips to gently tug a few soft, face-framing strands loose around your ears and temples to soften the frame.
Adapting for different lengths: If you have exceptionally long hair, simply wrap the excess trailing ends smoothly around the central elastic base and tuck them neatly underneath. If you are rocking a shorter bob or lob haircut, tie up what you can reach, and use a couple of miniature claw clips to secure any shorter layers at the nape of your neck that slip out of the band.
Styling Secret: Mist a light cloud of dry shampoo or texturizing spray directly at your roots before gathering your hair up. This introduces instant mechanical grip and airy separation, making your finished messy bun look twice as thick, full, and voluminous throughout the day.
Want more heatless ideas for your Hairstyle? Check out: Heatless Curls for Fine & Fragile Hair
2. The Bubble Pony Hairstyle (Aka the Scrunchie Stack)
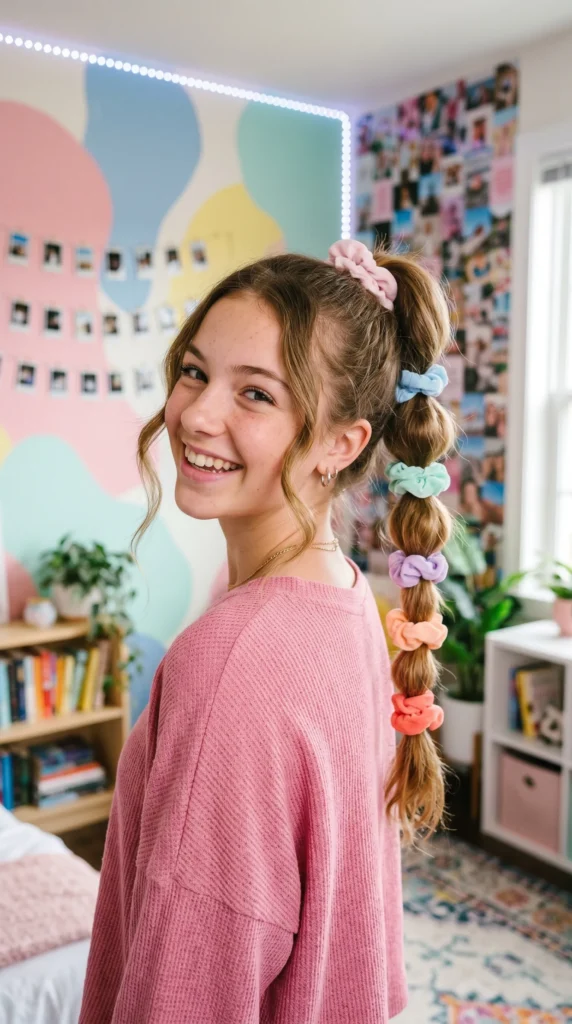
The playful bubble ponytail has completely taken over viral beauty feeds on TikTok and Pinterest, and it is easy to see why. This trend effortlessly transforms a standard, boring everyday ponytail into a highly graphic, youthful, and eye-catching masterpiece in a matter of minutes. The absolute best part about this look is that it requires zero complex braiding skills or advanced coordination.
How to execute this look in 2 minutes:
- Pull all of your locks backward into a secure high or mid-height ponytail, smoothing the crown down, and secure it firmly with a clear elastic band.
- Take a second clear elastic band and tie it around the ponytail length, positioning it roughly two inches below the main base.
- Use your fingers to gently pinch and pull the hair section trapped between the two elastics outward in a circular motion to form a rounded bubble.
- Repeat this spacing and pancaking process continuously down the remaining length of your ponytail, building three to four distinct bubbles for long hair, or two bubbles for shorter lengths.
The Scrunchie Stack Variation: For a colorful, retro transformation, swap out clear elastics in favor of a series of matching pastel scrunchies spaced evenly down the length. The physical thickness of the fabric scrunchies creates an automatic sectioning effect, completely eliminating the need to tug at the hair strands. This variation works beautifully on both pin-straight and wavy textures, as natural waves inject extra internal volume into each individual bubble segment.
Styling Secret: Before you begin pulling each hair section outward to shape the bubbles, lightly mist the length with a texturizing sea salt spray. This provides the strands with essential structural support, ensuring your bubbles maintain their round, plump shape all day long instead of collapsing flat by third period.
3. The Braided Headband Hack Hairstyle
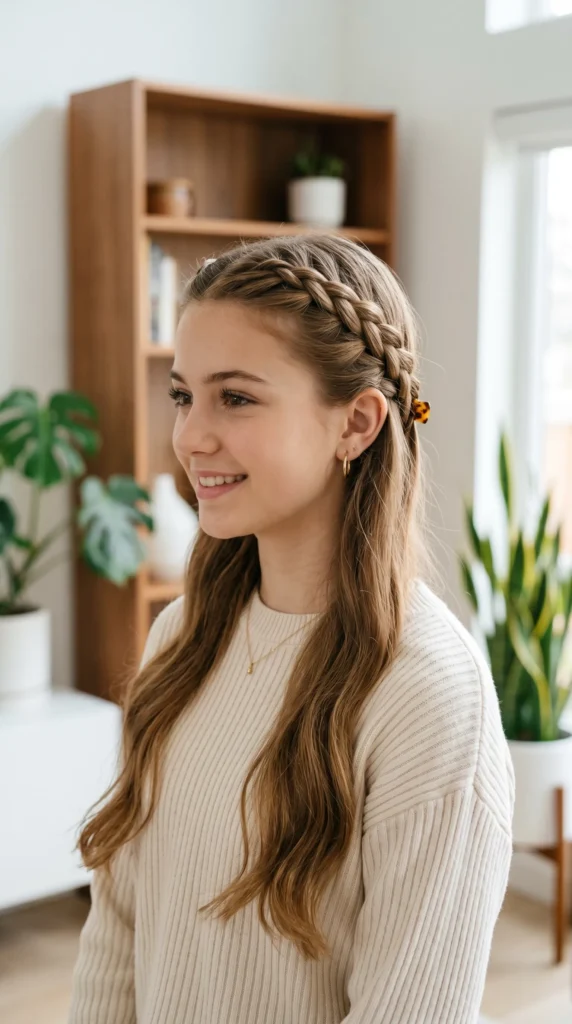
Have you misplaced your favorite fabric headband or want a unique way to style your hair for a sleepover? No problem at all. This clever, heatless style utilizes your own hair strands to hand-weave two small braids that mimic a built-in custom headband, keeping distracting layers completely out of your eyes during intense study sessions. It is one of those timeless hairstyles that looks incredibly intricate and detailed but takes under three minutes once you practice the basic pattern.
How to execute this look in 3 minutes:
- Use a tail comb to establish a clean, precise part directly down the middle of your head or slightly off-center.
- Isolate a small, one-inch section of hair right near your left temple line. Begin a classic Dutch braid, crossing the hair strands under instead of over to make the pattern pop upward with a 3D effect, incorporating tiny new fragments of hair as you move backward.
- Direct the braid path straight over and behind your left ear, stopping the active weaving once you clear the back of your earlobe, and lock the tail with a small clear elastic.
- Repeat the exact same Dutch braiding process on the right temple side of your head.
- Bring the two braid tails together neatly at the back of your head beneath your loose hair, and pin them flat against your scalp using a secure bobby pin out of sight.
Adapting for different lengths: If your hair is cut into a shorter bob hairstyle, you might find it difficult to stretch the braids all the way to the back of your head. Simply braid the temple strands straight down to the top of your ear, tuck the remaining loose tail neatly behind your earlobe, and anchor it flat with a single pin hidden under your hair.
Styling Secret: Always remember to pancake your braids. Once you secure the ends with your elastics, use your thumbs and index fingers to gently pull the outer loops of the braid apart. This instantly flattens and widens the pattern, making the braid look much thicker, softer, and more like an authentic headband rather than a tight, severe scalp braid.
4. The Twisted Claw-Clip Updo Hairstyle (But Make It Cute)
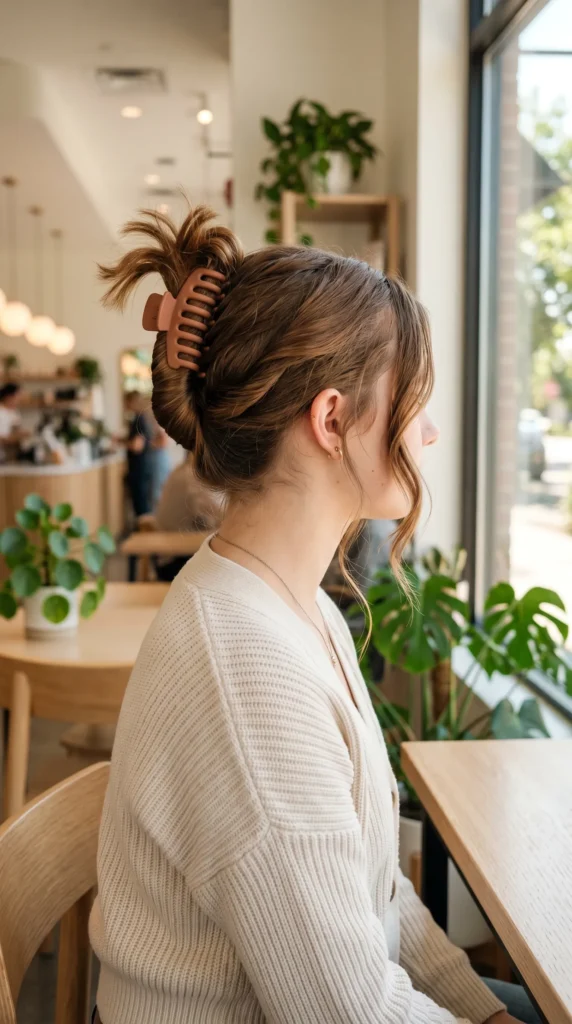
Modern claw clips are no longer reserved exclusively for lazy Sundays at home or quick facewash routines. With one simple, deliberate structural twist, they quickly convert into one of the chicest, most sophisticated updos for busy school weeks or weekend brunch dates. The true golden rule to keeping this look youthful and fresh rather than severe is ensuring you leave intentional tendrils loose to frame your face.
How to execute this look in 90 seconds:
- Gather all of your locks loosely at the lower nape of your neck as if you are forming a basic low ponytail.
- Twist the hair length tightly upward toward your crown until the strand begins to naturally coil against your head.
- Fold the twisted length completely flat against the back of your head, keeping the perimeter smooth.
- Snap a trendy, medium or large matte-finish claw clip firmly directly over the center of the folded coil to lock everything in place.
- Use your fingers to gently release a few delicate baby hairs and wispy strands around your face, jawline, and ears to soften the perimeter.
Adapting for different lengths: If your hair is exceptionally long, the tail of your twist might overflow past the top of the clip. Simply fold the excess length back down toward your neck once before snapping the claw clip shut. For shorter hair lengths, choose a smaller micro-claw clip, avoid twisting the strand too tightly, and let the raw ends fan out playfully over the top of the clip.
Styling Secret: Take a flat iron or a curling wand and style the loose, face-framing front tendrils for exactly five seconds each, curving them gently away from your eyes. This tiny, rapid detail instantly elevates the entire updo, making it look as though you stepped straight out of a professional beauty salon. If you are hunting for extra inspiration for an upcoming formal school dance, explore our expert curation of stunning prom hairstyles for long and short lengths to discover how to easily adapt these updos for a big night out!
Need more formal hairstyle inspiration? Prom Hairstyles for Long & Short Hair
5. The Half-Up Knotlette
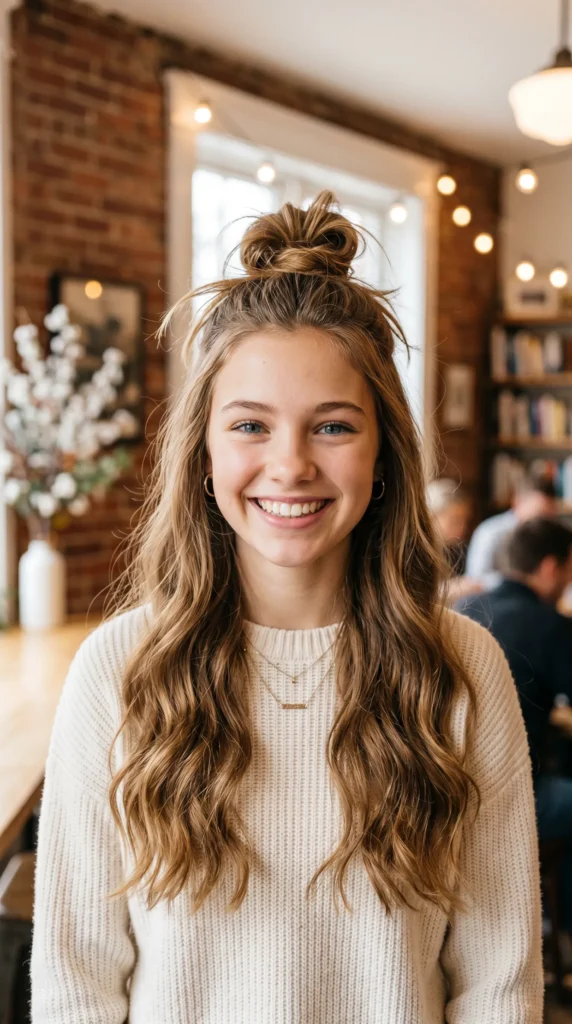
If you are obsessed with keeping your long locks flowing freely down your shoulders but absolutely despise having your hair fall forward onto your face while writing, the half-up knotlette is your ultimate styling solution. Think of this look as a miniature, ultra-trendy topknot sculpted exclusively out of the front section of your hair. It is exceptionally popular because it delivers the best of both worlds: full practical clearing up top while allowing your natural length to shine below.
This is a personal favorite hairstyle because it functions as a universal canvas, working absolute miracles across every single hair type, including pin-straight strands, natural beach waves, bouncy curls, or coarse textures.
How to execute this look in 2 minutes:
- Use your fingers to section off the top front half of your hair, tracing a clean line from the top of your left ear straight across your crown over to your right ear.
- Lift this gathered section upward and twist the length loosely to introduce instant texture.
- Wrap the twisted strand smoothly around its own central base on the very top of your head to build a tiny, compact knot.
- Secure the knotlette firmly using a small elastic band or a trendy miniature claw clip.
- Allow the remaining lower half of your hair to cascade down your back completely naturally.
Adapting for different lengths: On long hair, the knotlette will sit quite high and proud, delivering a dramatic, high-fashion top silhouette. If your hair is shorter, simply gather a much smaller, thinner section of hair from just above your forehead to craft a micro-knot, folding a mini ponytail in half rather than coiling it.
Styling Secret: Spritz the isolated top hair section with a generous mist of texturizing spray before you begin twisting it into a knot. Fine strands are naturally slippery, and this added grit provides the knotlette with essential holding power, preventing the elastic from sliding out or sagging by the end of third period.
Bonus: How to Make Your Hairstyles Last All Day Long
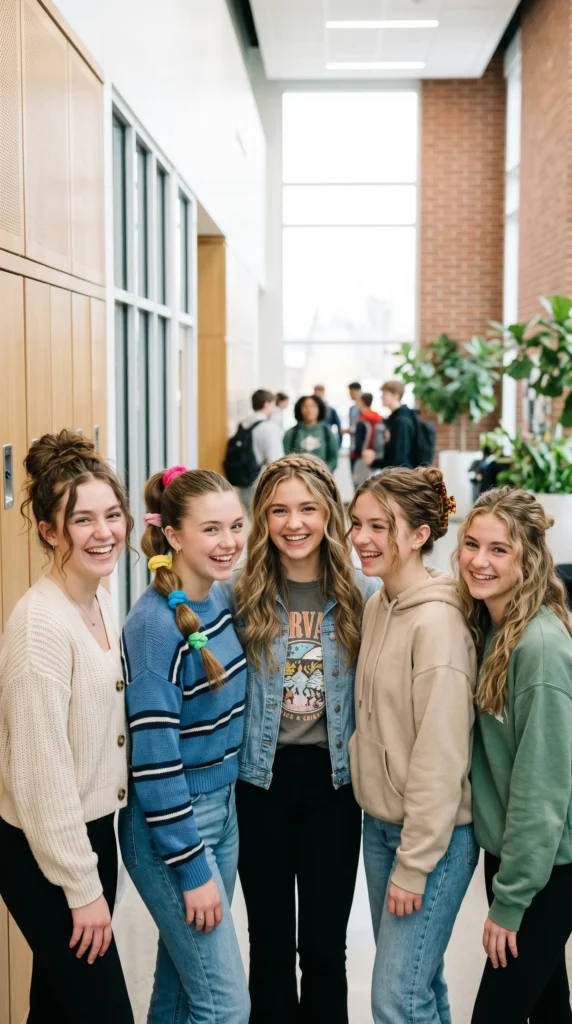
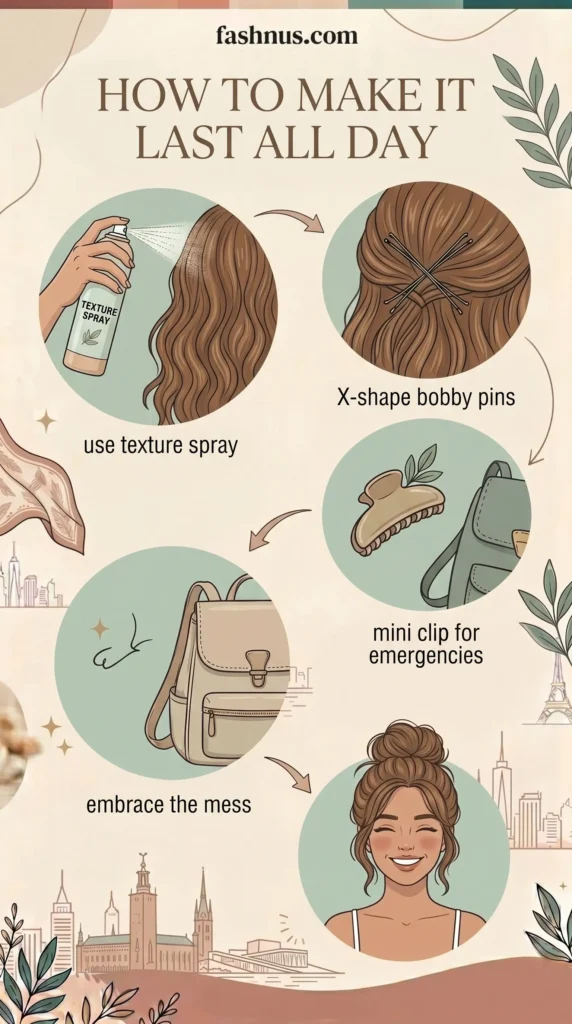
You have successfully styled your hair in under five minutes. Now, let us make sure your look actually survives lunch breaks, gym classes, windy commutes, and everything else on your busy calendar. Keep these simple daily rules in mind:
- Always Prep with Texture: Clean, freshly washed hair is naturally slippery and will struggle to hold clips or bands. Always apply a cloud of dry shampoo or texturizing mist before styling to build an ideal foundation.
- Lock Your Bobby Pins in an X Configuration: Never slide your bobby pins parallel into your strands, as they will easily slip out under movement. Always cross two pins directly over one another in a firm “X” shape to create a mechanical lock that won’t budge.
- Keep an Emergency Tool in Your Backpack: Toss a spare miniature claw clip and a couple of clear elastics into your school bag so you can execute rapid, five-second touch-ups between classes if needed.
- Embrace Perfectly Imperfect Texture: The absolute best part about these modern styles is that they are supposed to look slightly relaxed, lived-in, and undone. Absolute, unmoving perfection is highly overrated, so let your natural texture shine through with confidence!
If you love exploring quick, low-effort hair routines that protect your strands from daily damage, make sure to read through our ultimate lazy girl guide to long hair to unlock more time-saving secrets!
You Might Like: The “Lazy Girl” Guide to Long Hair
Table of Contents
Which Style Will You Recreate Tomorrow Morning?
Your hair should always be a fun, creative, and stress-free expression of your personality, keeping you confident throughout your daily routine.
Whether you choose the effortless volume of the messy bun, the playful energy of the bubble pony, the unique structure of the braided headband, the chic polish of the claw-clip updo, or the modern clean lines of the half-up knotlette, there is a perfect formula here to upgrade your week.
Save your favorite inspiration look formulas to your Pinterest boards, grab your scrunchies, and enjoy the beauty of an easy morning routine!
Read more in our website . . .


Cute Haiedos.
Thank you. 👍
So cute love all of these hairstyles I do my hair everyday for school I have so many hairstyles I switch of to definitely adding these to my list.
I am happy about that. Take a look at the other articles as well. 💛